Generate a Design
This guide will walk you through how to generate a design using Core3D's API via HTTP requests.
$TOKEN as a placeholder for your API token in the examples below.Contents
- Step 1 — Choose an Image
- Step 2 — Choose a Model
- Step 3 — Create a Generation
- Step 4 — Check the Status
- Step 5 — View the Results
Step 1 — Choose an Image
We need to pick an image to use for our design generation. For this example we'll use the result from the previous Generate An Image guide, which is a "pattern" with the URI core3d:upload:018d7045-c918-7add-921f-9fd36a42e5d8.
Step 2 — Choose a Model
We need to pick the model (or product) we're designing onto: a tee, hoodie, mug, etc. We'll use of the publicly available models supplied by Core3D. We'll need to list what's available in order to pick one we like.
- Request
- Response
$ curl https://api.core3d.io/v1/models \-H "Authorization: Bearer $TOKEN"
Models can be previewed via the images.default.fullsize.url property. We'll take note of the uri property which we'll need in the next step.
Step 3 — Create a Generation
We're ready to create a design generation, let's supply a few parameters to kick it off.
- Request
- Response
$ curl -X POST https://api.core3d.io/v1/generations \-H "Authorization: Bearer $TOKEN" \-H "Content-Type: application/json" \-d '{"type": "design","data": {"colors": ["black"],"details": "white","model": "core3d:model:018d4771-e20c-75b9-97be-1062c1f081b7","upload": "core3d:upload:018d7045-c918-7add-921f-9fd36a42e5d8","type": "pattern"}}'
Cool! Our generation has been created and has a pending status. Make note of the uri property, we'll need it in the next step.
Step 4 — Check the Status
This follows the same pattern from the Generate An Image guide. We can poll the API using the id from the last request until the generation is complete.
- Request
- Response
# NOTE: For convenience, you can use a URI as# the identity parameter in API requests.$ curl https://api.core3d.io/v1/generations/core3d:generation:018d715f-93b3-76a7-9775-76f5e4d43ef2 \-H "Authorization: Bearer $TOKEN"
Once the generation is done, the status will read "ok". We're interested in the result.designs property, which contains a uri property of the generated design and an aspects property which tells you a bit about how the design was generated. We'll copy the design uri for the next step.
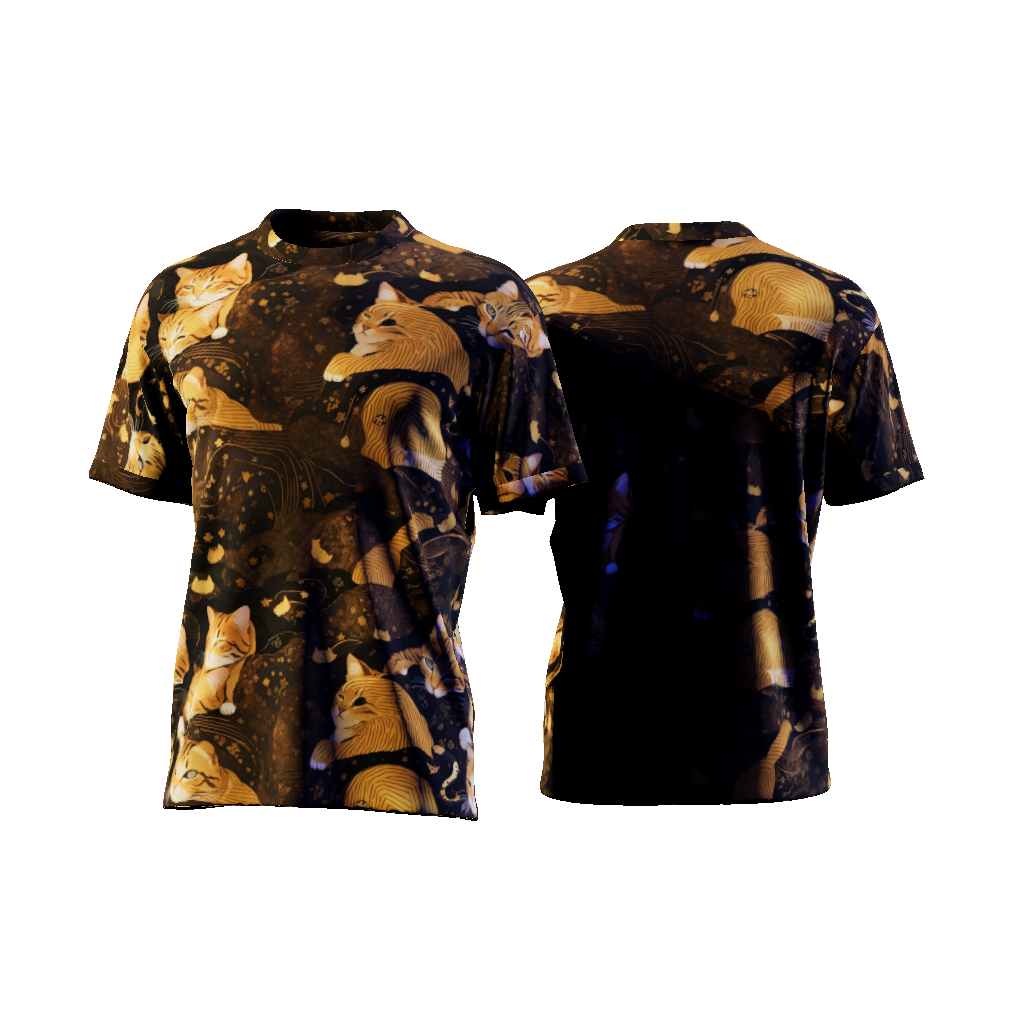
Step 5 — View the Results
We can make an additional request for each item in the result.designs property to retrieve a presigned URL that we can use to display or download a render of the design. Renders can take a few moments to appear, so we'll poll this endpoint until the images.default.fullsize.url property contains a URL.
- Request
- Response
$ curl https://api.core3d.io/v1/designs/core3d:design:018d715f-b81f-79e7-a942-c9e4f3f5f1cc" \-H "Authorization: Bearer $TOKEN"
And the result is...